Discovering a flat tyre can be a frustrating interruption to your day. However, with the right knowledge and tools, you can quickly address a puncture and get back on the road. This guide provides an in-depth look at how to fix a flat tyre, covering everything from initial assessment to the steps required for repair or replacement. By understanding these simple steps and when to apply them, tyre repair does not have to be a daunting task.

What are the initial steps when you discover a flat tyre?
How to safely assess the punctured tyre
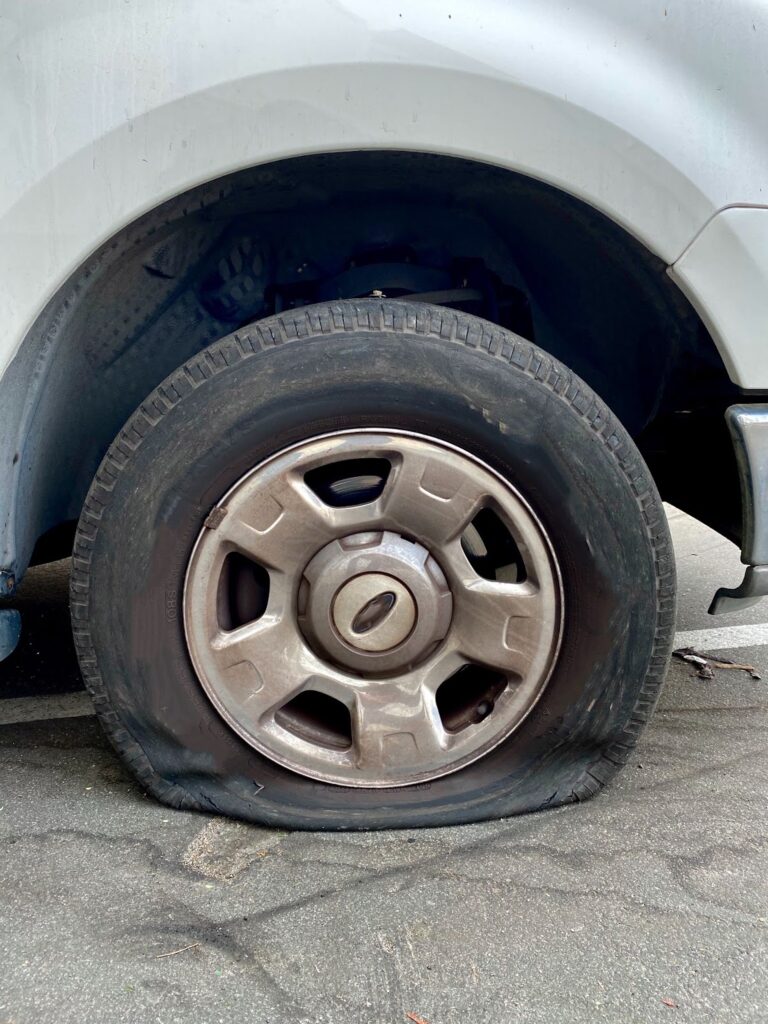
When you get a puncture, the first step is to find a safe place to pull over and assess the damaged tyre. Ensure that the vehicle is parked on a level surface and that you have activated your hazard lights. Inspecting the tyre sidewall and tread for the puncture that has occurred is crucial. The sidewall of the tyre is more vulnerable, and damage here often means the entire tyre will need to be replaced. Conversely, a puncture in the tread may require repair.
Tools and repair kits needed for fixing a flat tyre
For effective puncture repair, you’ll need a few essential tools and a tyre repair kit. A standard kit should include a jack, lug wrench, and tyre puncture repair tools such as sealant and a pump to reinflate the tyre. It’s also wise to have a spare tyre or a repair kit with patches and plugs. Familiarize yourself with these tools and ensure they’re all present and in good condition before setting off on any journey.
Preparations before removing the punctured tyre
Before attempting to change or repair a flat tyre, ensure the vehicle is in a stable position, and the parking brake is engaged. Remove any hubcaps or wheel covers to access the tyre’s lug nuts. Loosen these slightly before lifting the vehicle with a jack. It’s essential for your safety and efficiency that these initial steps are followed precisely.
Can any tyre puncture be repaired with a puncture repair kit?
Understanding the types of punctures that can be repaired
A puncture in the tyre’s tread area is often repairable, especially if it’s less than 1/4 inch in diameter. A puncture repair kit, such as tyre sealant or a patch, can effectively fix such damages and allow you to continue driving. However, punctures to the tyre sidewall or those larger than 1/4 inch typically require tyre replacement to ensure safety and performance.
Limitations of puncture repair kits
While puncture repair kits are convenient, they are not a one-size-fits-all solution. Repairs with a kit are usually temporary and are not suitable for large or irregular cuts. Furthermore, if the puncture has caused structural damage to the tyre, such as compromised tyre sidewalls, using a repair kit could be unsafe. It’s also worth noting that some tyre repair kits are designed for specific types of tyres, such as runner flat tyres, and may not be effective on others.
When to opt for tyre replacement instead of repair
If a puncture occurs on the sidewall of the tyre or is large and irregular, replacing the tyre is often the safest option. Driving on a tyre with a damaged sidewall can lead to dangerous blowouts. Additionally, repetitive punctures or significant wear and tear can compromise a tyre’s integrity, making repair unadvisable. In such cases, getting a new tyre is not just a recommendation; it is a requirement for safety.
Steps to effectively use a tyre puncture repair sealant
Choosing the right tyre sealant for your car tyre
Not all tyre sealants are created equal, and finding the right one for your car tyre is essential. Sealants are available in pre-injected bottles or cans that can be applied directly to the tyre valve. To avoid damage, ensure the sealant is compatible with run-flat tyres or cars equipped with tyre pressure monitoring systems. Always check the product specifications against your vehicle and tyre requirements before making a selection.
Detailed guide on applying sealant for puncture repair
To repair a punctured tyre with sealant, first, remove any debris from the puncture site. Attach the hose from the sealant bottle to the tyre valve and inject the sealant into the tyre. Once the sealant is in, reinflate the tyre to the correct tyre pressure. It’s essential to drive a short distance immediately after application, as this helps the sealant spread evenly and seal the puncture effectively.
Post-sealant application: What to do next
After using a sealant, it’s advisable to visit a tyre repair professional as soon as possible. While sealants can offer a quick fix, a thorough inspection, and possible professional repair are necessary to ensure the tyre’s long-term safety and reliability. Additionally, the sealant can affect the tyre pressure sensor, which should be checked and cleaned if required.

How to change a tyre and use a spare tyre safely?
A step-by-step guide to removing the damaged tyre
After loosening the lug nuts and lifting the car with a jack, remove the lug nuts completely and take off the damaged tyre. Store the removed tyre properly in your vehicle if it is to be repaired or disposed of later. Take care to align the spare wheel or new tyre with the wheel bolts and secure it by screwing the lug nuts back on by hand before lowering the vehicle and tightening them with a wrench.
Correctly mounting the spare tyre
Mounting the spare tyre correctly is crucial for safety. Ensure the tyre is directed appropriately and the air valve is facing outwards. Start by screwing the lug nuts on by hand to avoid cross-threading and then use the lug wrench to tighten them in a star pattern. This ensures even pressure distribution across the wheel rim, which is vital for maintaining the tyre’s balance and integrity.
Tips to ensure your spare tyre is always ready for use
As part of your routine maintenance, regularly check your spare tyre’s air pressure. Also, inspect the tyre tread and overall condition to ensure it’s safe for use when needed. Remember, a spare tyre is typically meant for temporary use and should be replaced with a permanent tyre as soon as practical. Keeping your spare tyre in good condition will prepare you for any unexpected punctures, allowing you to get back on the road with minimal disruption quickly.
Dealing with slow punctures and run-flat tyres
Identifying and managing slow puncture issues
Slow punctures can be deceptive as they allow the tyre to gradually lose air over time. Regularly checking your tyre pressure is key to identifying a slow puncture early. If you suspect a slow puncture, inspect the tyre for embedded objects or listen for the hiss of escaping air. Early detection and repair can extend the tyre’s life and maintain your vehicle’s safety. In addition to visual inspections, familiarize yourself with safety tips for slow punctures to ensure a proactive approach. Carrying a tire repair kit in your vehicle can be a lifesaver in case of emergencies, allowing you to address minor issues on the spot. Furthermore, visiting a trusted mechanic for regular maintenance can help detect slow punctures before they become a significant problem.
Understanding the benefits and limitations of run-flat tyres
Run-flat tyres can be a genuine lifesaver, allowing you to continue driving for a limited distance after getting a puncture. This technology means you’re less likely to be stranded on the side of the road due to a flat tyre. However, run-flat tyres have their limitations, including a stiffer ride and often being more expensive to replace than standard tyres. It’s important to weigh these factors when considering run-flat tyres for your vehicle.
Repairing punctures in run-flat tyres: Is it possible?
While some manufacturers allow the repair of run-flat tyres under specific conditions, it is generally recommended that they be replaced after a puncture. The structure of run-flat tyres, designed to support the car even without air, can be compromised after being driven flat. Consult with professionals, such as AVS, to ensure a perfect finish on your tyers, and refer to your tyre’s manual to make an informed decision regarding the repair or replacement of a run-flat tyre. When it comes to maintaining vehicle safety, adhering to tyre replacement frequency recommendations is crucial. Regularly inspecting your tyres and replacing them as suggested can enhance performance and ensure optimal safety on the road. Additionally, staying informed about your specific tyre model’s requirements can help you avoid potential hazards related to tyre wear and damage.

Conclusion: Mastering the Art of Tyre Repair
In conclusion, this ultimate puncture repair guide has equipped you with all the necessary knowledge and techniques to tackle a flat tyre with confidence. From understanding the anatomy of a tyre and identifying a puncture to the execution of a flawless repair – you’ve learned it all. We’ve journeyed through choosing the right puncture repair kit, utilizing tyre sealant correctly, and even delved into the specifics of repairing run-flat tyres. Whether it was a simple puncture or a more daunting slow puncture, the steps provided have aimed to ensure that you are never left stranded on the side of the road again.
Remember, the key to successful tyre repair lies in not just in the act itself but in the preparation and understanding of the process. With the knowledge of how to accurately assess the damage, choose the appropriate repair method, and execute the repair securely, you can rest assured that your tyre puncture woes are a thing of the past. So, the next time you’re faced with a punctured tyre, recall the simple yet effective steps outlined in this guide and get yourself back on the road with minimal hassle. Happy driving!


